

Your new WordPress installation may already have a bunch of plugins installed. We’re going to clean those up and install the few plugins we need to get started.
What Is a Plugin?
A plugin adds a feature or function to WordPress.
For now, we’re keeping this simple: keep what we need, remove what we don’t, and add plugins only when we have a reason to use them.
On This Page
| Check Your Plugins | Clean Up Plugins |
| Install Classic Editor | Install Classic Widgets |
| Install WPForms Lite | Check Your Final Plugin List |
1. Check Your Installed Plugins
From your WordPress dashboard, go to:
Plugins → Installed Plugins

Your list may be different from the one shown here.
Our Softaculous installation added about 20 plugins. We don’t need all of them.
For now, we’re keeping:
- Backuply
- Loginizer
2. Clean Up the Plugins
We’re going to remove the plugins we don’t need.

Watch for Pro Versions
If you are removing both a regular plugin and its Pro version, deactivate the Pro version first and remove the Pro version before removing the regular version.
To remove the unwanted plugins:
- ☐ Check the boxes beside the plugins you want to remove.
- ☐ Select Deactivate from Bulk actions.
- ☐ Click Apply.
- ☐ Select the unwanted plugins again.
- ☐ Select Delete from Bulk actions.
- ☐ Click Apply.
- ☐ Confirm the deletion if WordPress asks.
When you’re finished removing unwanted plugins, you should have a much shorter plugin list.

3. Install Classic Editor
Now we are going to add the plugins that you will be using.
Go to: Plugins → Add Plugin
In the search box, enter: Classic Editor

Find Classic Editor by the WordPress Contributors.
- ☐ Click Install Now.
- ☐ Wait for the installation to finish.
- ☐ Click Activate.
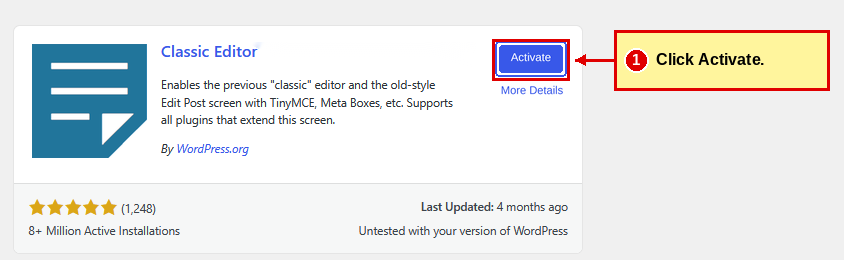
Classic Editor is now installed and active.
4. Install Classic Widgets
Classic Editor doesn’t change the Widgets screen. This plugin does, so we can manage the sidebar and footer without blocks.
Go to: Plugins → Add Plugin
In the search box, enter: Classic Widgets

Find Classic Widgets. The search screen lists the developer as Tonya Mork; your plugin list will show WordPress Contributors. Same plugin.
Not the Look-Alike
Skip Classic Editor and Classic Widgets. That’s a different plugin by a different developer.
- ☐ Click Install Now.
- ☐ Wait for the installation to finish.
- ☐ Click Activate.

Classic Widgets has no settings. Once it’s active, you’re done.
5. Install WPForms Lite
Go to: Plugins → Add Plugin
Search for: WPForms

Find WPForms Lite.
- ☐ Click Install Now.
- ☐ Wait for the installation to finish.
Return to Plugins → Installed Plugins if necessary.

Find WPForms Lite and click Activate.
WPForms May Open a Welcome Screen

If WPForms takes you to its Welcome screen or offers to start the Setup Wizard, stop here.
You don’t need to create a form yet.
We’ll come back to WPForms later when we build your Contact page.
Click Plugins → Installed Plugins to return to your plugin list.
6. Check Your Plugin List
You should now have these five plugins installed and active:
- ☐ Backuply
- ☐ Classic Editor
- ☐ Classic Widgets
- ☐ Loginizer
- ☐ WPForms Lite

That’s All You Need to Begin
Don’t install plugins just because they’re available. Add another plugin when your website actually needs something the plugin provides.
Want to know more? Read Chapter 7: Inside WordPress → Plugins.
| ← Step 6 WordPress Settings |
Down & Dirty | Step 8 Themes → |
