
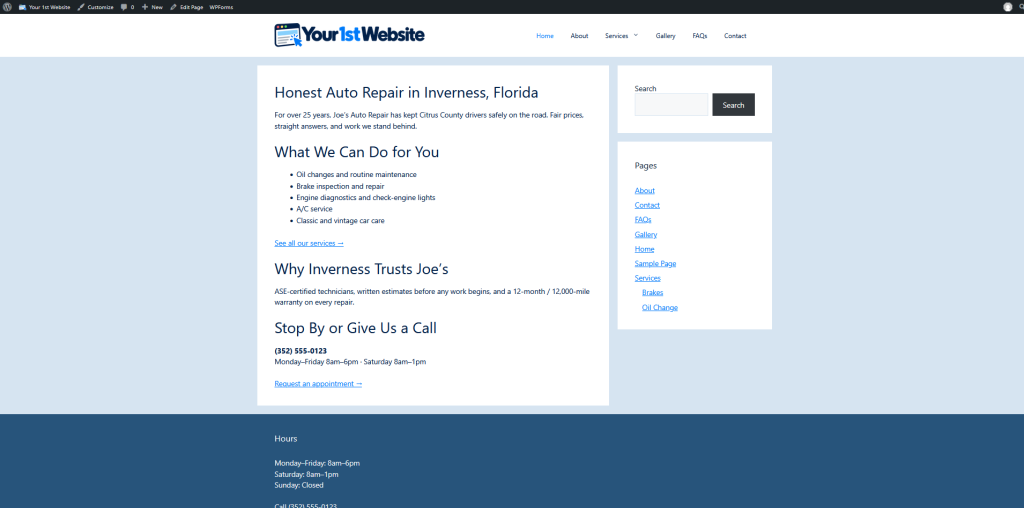
Your website works. Every page is built, your menu is in place, and visitors can contact you. But right now it probably looks a lot like ours did:

That’s the theme’s default look, plain and gray. In this chapter we’ll make it look like yours: a logo, your own colors and fonts, and your own copyright line. Then we’ll run a few final checks before you tell the world.
Back Up Before You Change the Look
Changing colors and fonts won’t break anything, but it’s easy to make a lot of changes and then wish you could go back. A backup is your “undo” button for the whole website.
Back in Chapter 7, we kept the Backuply plugin for exactly this. With two checkboxes and one button, it makes a complete copy of your website: all your pages, images and settings.
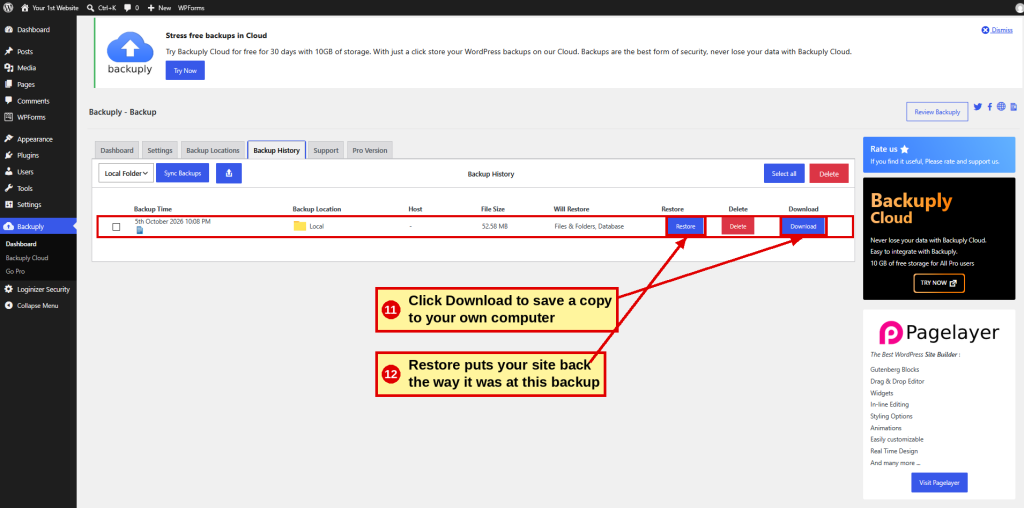
Once the backup is made, you’ll see it in your Backup History, with a Restore button to put your site back the way it was and a Download button.
Download a Copy
Backuply’s free version saves backups on the same server as your website. If that server ever has a serious problem, the backup could go with it. Download a copy to your own computer, too.
Make It a Habit
To scheduled automatic backups are a paid feature in Backuply, YOU DO NOT NEED THE PAID VERSION.
With the free version, make a backup yourself before any big change, and every so often after you’ve added new content.
For even more control, your hosting account has its own backup tools in cPanel. You can back up your entire account, including your website, its database and your email. We’ll show you how in our Bonus section.
A Logo and Site Icon, Made with AI
A logo is often the single biggest thing that makes a website look professional. You don’t need to be a designer or hire one. AI tools like ChatGPT, Gemini, Claude and Canva can create a logo for you, as long as you tell them clearly what you want.
You need two images:
- A logo: wide, with your business name, for the top of every page.
- A site icon: a small square picture that shows in the browser tab and in bookmarks.
How to Ask
The more you tell the AI, the better the result. Include your exact business name (spelled out, in quotes), what your business does, the feel you’re going for (friendly, professional, old-school, modern), any colors you like, and anything to avoid.
Then the part most people forget: the size and file type. Your logo will display about 350 pixels wide, so ask for twice that, 700 pixels wide, so it stays sharp on phones and high-resolution screens. Ask for a PNG with a transparent background so it sits cleanly on any color. WordPress doesn’t accept SVG files without extra plugins.
Copy This Request
Change the parts in brackets, then paste it into your AI tool:
Create a logo for my business, “[Your Business Name].” We are [what you do] for [who your customers are]. I want it to feel [friendly / professional / modern]. Use [your colors, or “colors that suit my business”]. Keep it simple and easy to read. Make it a wide horizontal logo, about 700 pixels wide by 140 pixels tall, on a transparent background, saved as a PNG. Also make a square version of just the icon, 512 × 512 pixels, transparent background, PNG. Give me 3 options.
Pick the option you like best, then ask for changes in plain words: “make the letters bolder,” “use a darker blue,” “remove the tagline.” Here’s what we ended up with:

Before you use it, check three things. Read every word, because AI tools sometimes scramble letters. Shrink it down and make sure you can still read it. And make sure it doesn’t look like another company’s logo.
Adding Your Logo
Your logo and site icon go in Appearance → Customize → Site Identity. The Customizer is where you control your website’s look, and it shows you a live preview as you make changes.
A few things to know before you start:
- WordPress may offer to crop your logo. Its crop box is a fixed shape that can cut off part of your logo, so choose Skip cropping.
- If your logo already includes your business name, hide the site title so the name doesn’t appear twice.
- Set the Logo Width to about 350 pixels. A logo that’s too big pushes your menu onto a second line.

Don’t Forget to Publish
Nothing you change in the Customizer is live until you click Publish. When the button says Published, your changes are saved.
Layout
Before changing colors, it helps to know how your page is put together. In the Customizer, Layout controls the shape of your website: how wide things are, where things sit, and which parts show up at all.
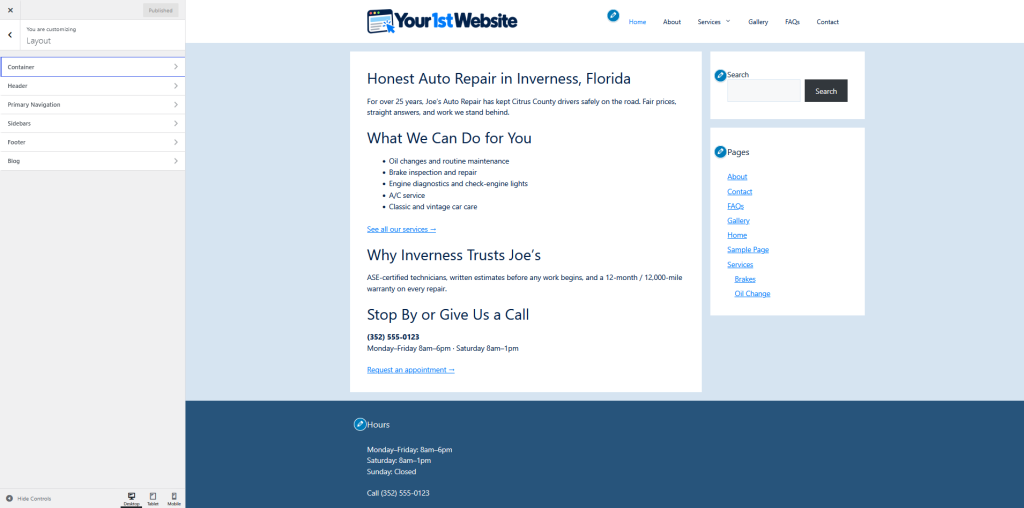
Here’s what each part covers:
- Container: how wide your content is on a large screen, and whether your content sits in separate white boxes (like ours) or one continuous area.
- Header: the top of your page, where your logo and menu sit. You can make it stretch across the full screen or line up with your content.
- Primary Navigation: your menu. Where it sits (beside the logo or below it), which way it lines up, and how drop-down menus like our Services menu open.
- Sidebars: whether your pages have a sidebar on the right, on the left, on both sides, or none at all.
- Footer: the bottom of your page, including how many footer widget columns show up. Remember Footer Widget 1 through 5 from Chapter 12? This is where you choose how many of them appear.
- Blog: settings for blog posts. Our website is built with pages, so you can skip this one.
You don’t need to change any of these. The theme’s defaults work well, and our website uses them as they are. But when something looks “off,” like a sidebar you don’t want or a footer column that won’t show, Layout is usually where the answer is.
No Sidebar on One Page?
The Sidebars setting changes every page at once. To remove the sidebar from just one page, such as your Contact page, open that page in the editor and look for the Layout box beside your content.
Colors
The easiest way to choose colors for your website is to use the ones already in your logo. It ties everything together.
Every color on a website has a code called a hex code: a # followed by six letters and numbers. You don’t have to figure these out yourself. Just ask your AI tool, “What are the hex color codes in this logo?” Our logo uses navy (#012049), bright blue (#0079FA) and a light blue.
GeneratePress has a row of colors at the top of Customize → Colors called Global Colors. Most of your website pulls its colors from this row, so changing a few of these circles changes almost everything at once: your text, headings, links and more.
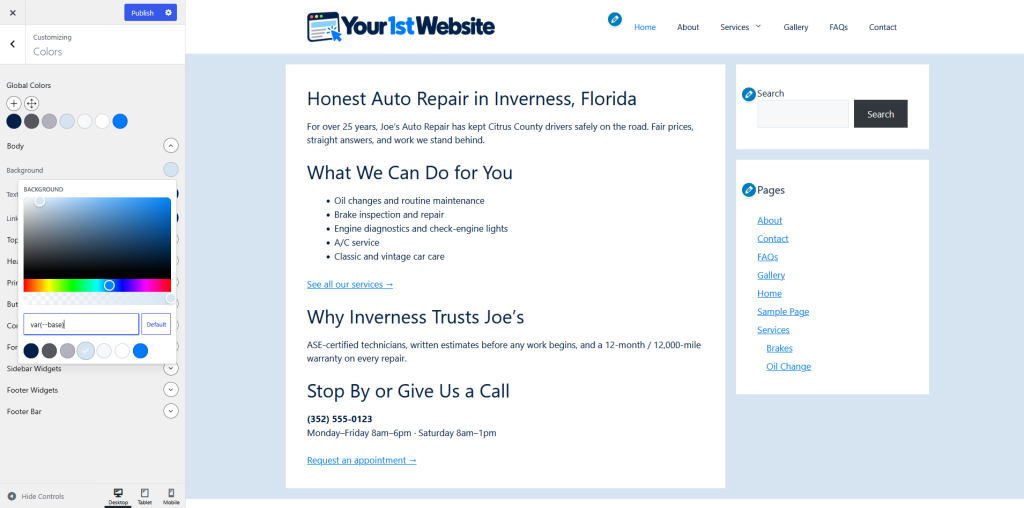
After that, a few touches go a long way: a light page background, buttons in your brand color, and a dark footer to give the bottom of each page a solid finish.
Changed Your Mind?
Every color setting has a Default button that puts it back the way it was.
Fonts
Fonts give your website its personality. A rounded font feels friendly, and a sharp, clean font feels professional. You don’t need many: one font for your headings that matches the feel of your logo, with the theme’s standard font for everything else. More than two fonts starts to look messy.
Fonts are set in Customize → Typography. We chose Nunito for our headings because its rounded letters match our logo.
A Little CSS
CSS is a set of instructions that tells a web browser how things should look: colors, sizes, spacing, what to show and what to hide. Your theme is built on it.
You don’t need to learn CSS. But sometimes a single line of it can do what no setting can, and WordPress gives you a safe place to paste it.
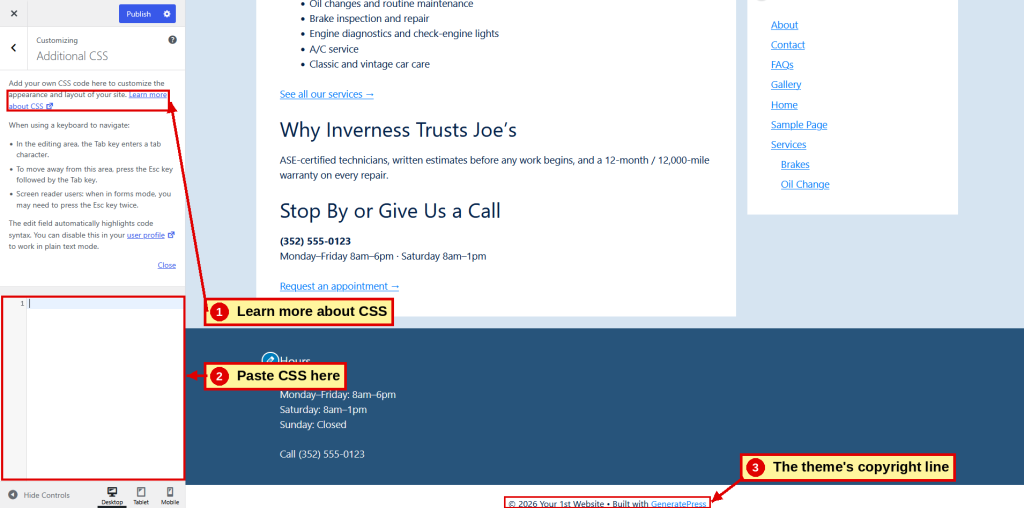
In the Customizer, click Additional CSS.
Curious?
At the top of the Additional CSS panel is a Learn more about CSS link if you’d like to explore. You don’t need it for this guide.
Change the Copyright Line
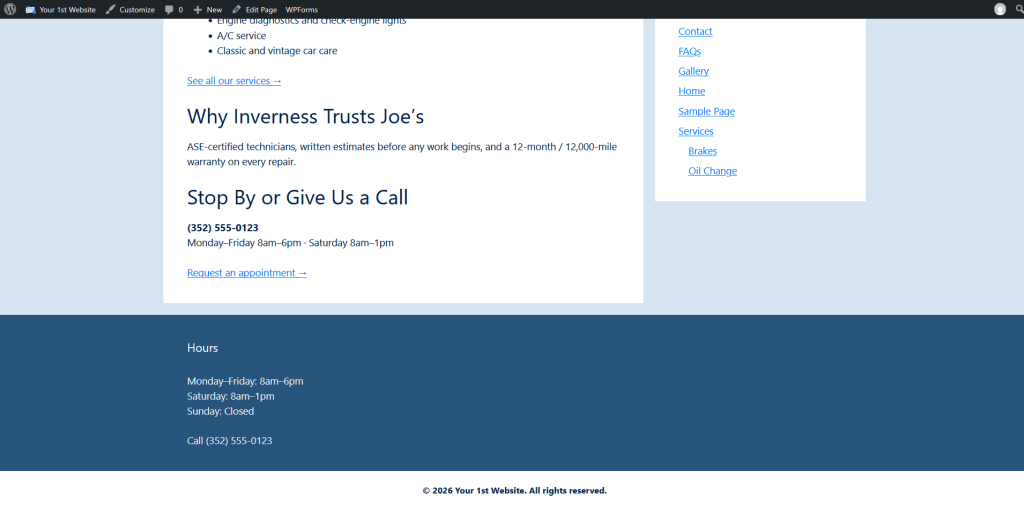
At the very bottom of your site is a line that says © 2026 Your 1st Website • Built with GeneratePress. The theme doesn’t have a setting to change it, so we’ll hide it with one line of CSS and add our own.
Hide the Old Line
In Additional CSS, copy and paste this exactly:
.copyright-bar { display: none; }
Click Publish.

Add Your Own
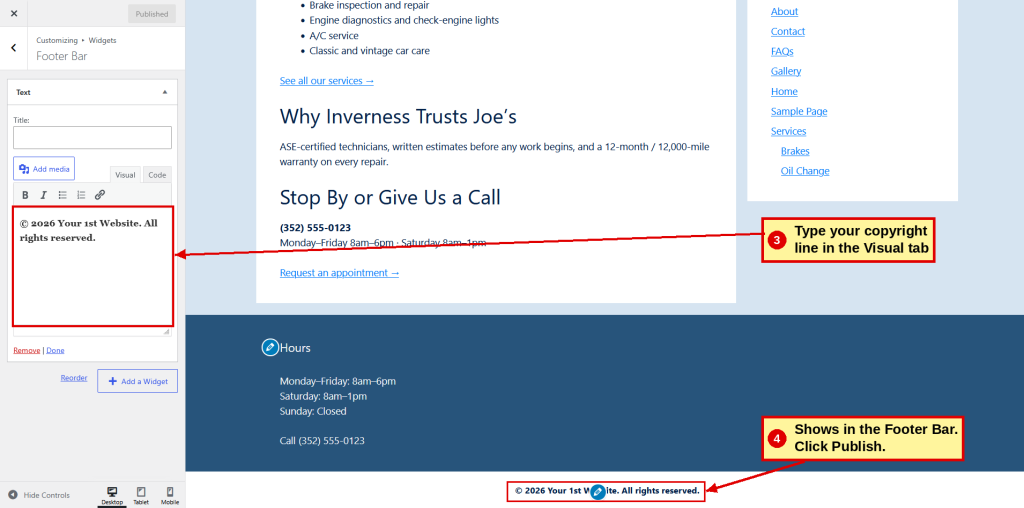
Go to Appearance → Widgets.
- Go to Footer Bar, Add a Text widget
- Leave the title blank.
- In the Visual tab, type your copyright line, for example: © 2026 Your 1st Website. All rights reserved.
- Click Save.
Typing the © Symbol
On Windows, hold Alt and type 0169 on the number pad. On a Mac, press Option + G. Or just type (c).
Every January
This line won’t update itself. Change the year at the start of each new year.
Final Checks
Let Search Engines Find You
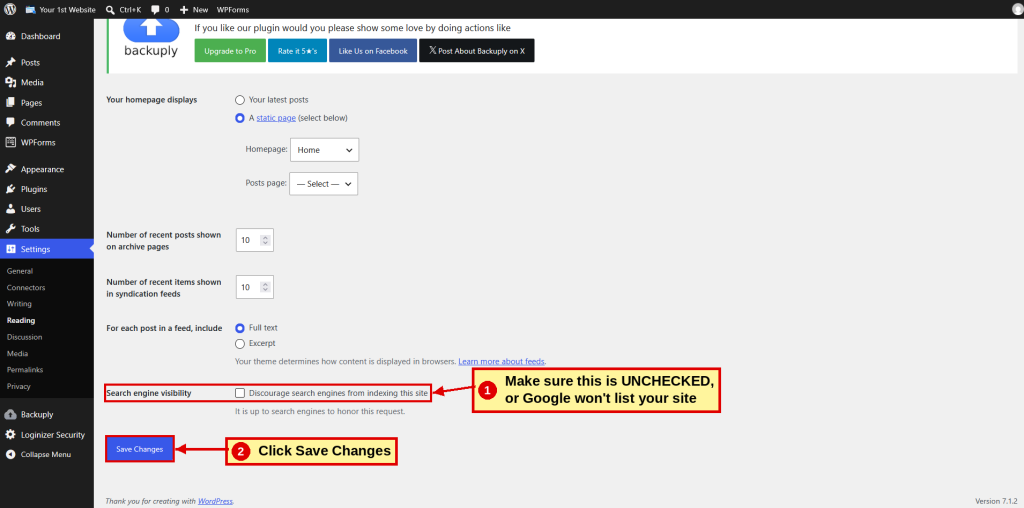
Go to Settings → Reading. Make sure Discourage search engines from indexing this site is unchecked. If it’s checked, Google won’t list your website.
Remove the Sample Post
WordPress added a post called Hello world! when it was installed. Go to Posts, hover over Hello world! and click Trash.

Click Every Link
Visit your website and click every menu item and every link. Make sure each one goes where it should.
Check Your Site on a Phone and Tablet
Most of your visitors will be on a phone or tablet. In the Customizer, the buttons at the bottom left let you see your site the way each one shows it:
- Click Mobile to see it on a phone. Your menu turns into a ☰ button. Visitors tap it to open the menu.
- Click Tablet to see it on a tablet.
- Click Desktop to go back to the full-size view.

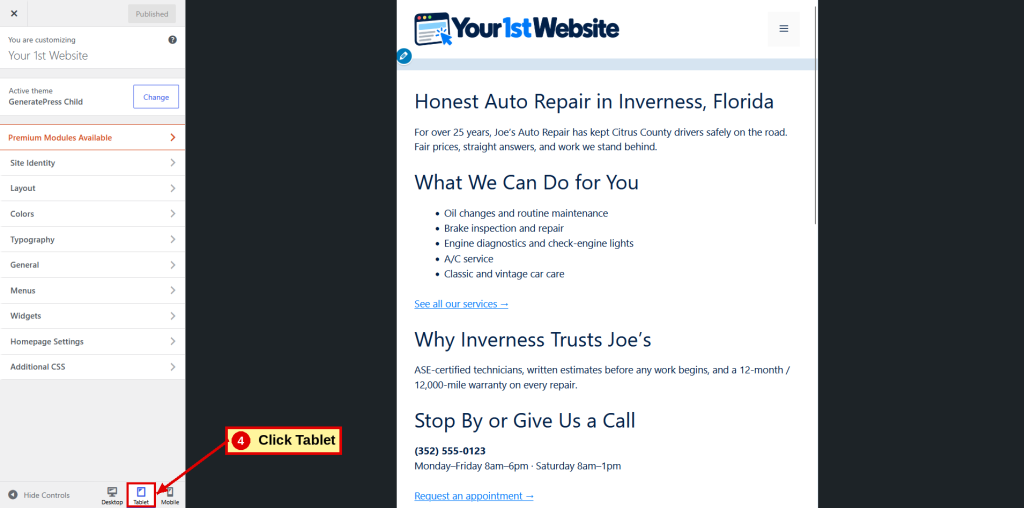
Scroll through each view and make sure everything is easy to read and nothing looks squeezed or cut off.
Make Another Backup
Your website is finished, so back it up again and download a copy.
Congratulations: You Built a Website!
Take a moment and look at what you’ve done. You picked a domain, set up hosting, installed WordPress, built your pages, added a menu, a contact form, email, your own logo and your own colors.
You didn’t hire anyone. You did it yourself, and now you know how to change any of it whenever you want.
Your website is open for business.
You now know how to:
- Back up your website and download a copy.
- Use AI to create a logo and site icon.
- Add your logo, site icon, colors and fonts.
- Use a line of CSS to change something the theme doesn’t let you change.
- Run the final checks before telling the world.
Want to Do More?
Ready for a few extra touches? Our Bonus package adds handy extras, like a copyright year that updates itself, without having to learn a lot of code.
Prefer the Down & Dirty Version? Step 17: Final Touches
Our illustrated Down & Dirty guide walks you through these final touches with numbered instructions, screenshots and checkboxes.
← Previous |
Chapter 14 | Bonus Package → |
