

Your website works. Now we’ll back it up, add your logo and site icon, change a few colors, replace the copyright line and run the final checks.
Remember to Click Publish
Changes in the Customizer aren’t live until you click Publish. When the button says Published, you’re saved.
On This Page
| Back Up Your Site | Create Your Logo with AI |
| Add Your Logo | Add Your Site Icon |
| Change Your Colors | Choose a Font |
| Change the Copyright Line | Final Checks |
| You Built a Website! | |
1. Back Up Your Site
- ☐ Click Backuply in the left-hand menu.
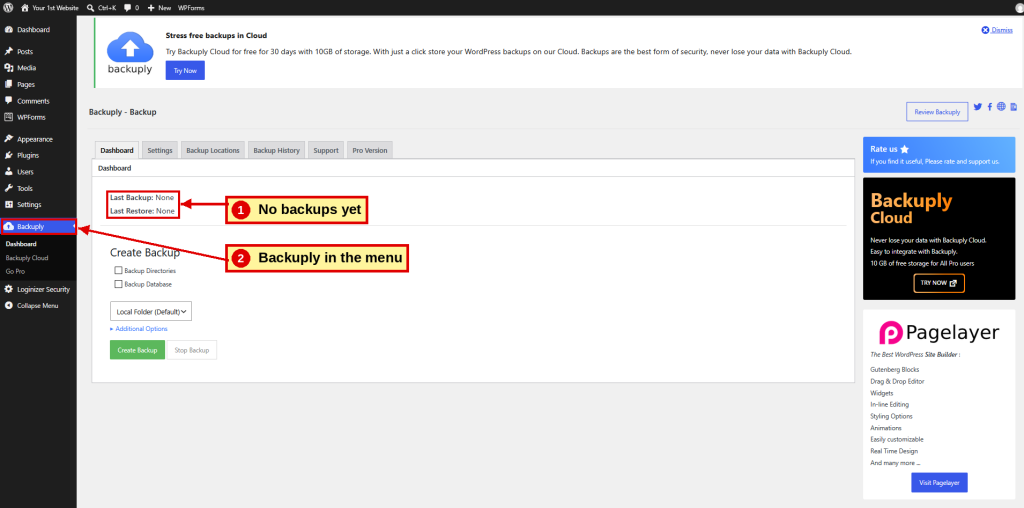
- ☐ Check Backup Directories and Backup Database.
- ☐ Leave it on Local Folder (Default).
- ☐ Click Create Backup.

- ☐ Wait for 100%.

- ☐ When you see Backup Successfully Completed, click Finish.

- ☐ Click the Backup History tab.
- ☐ Click Download and save a copy on your computer.
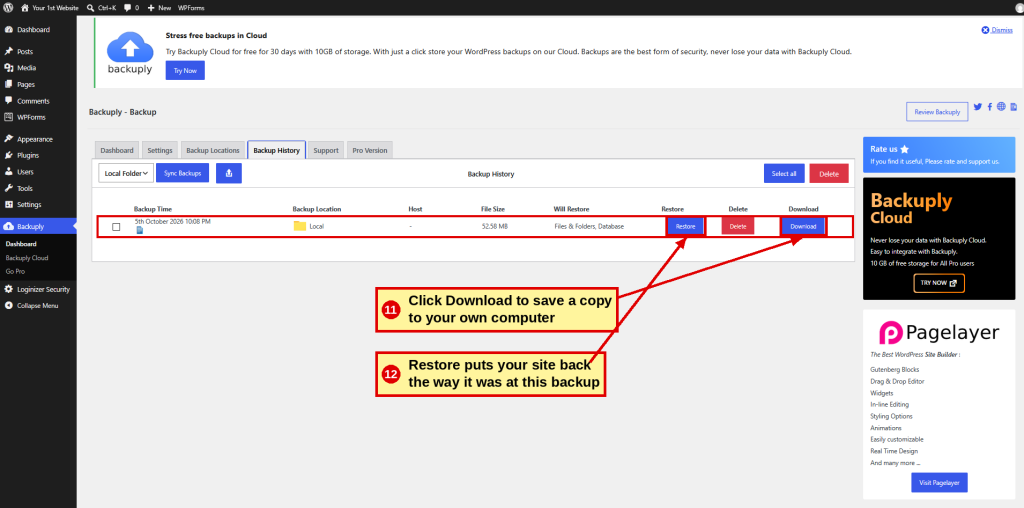
Why Download?
Local Folder backups are stored on the same server as your website. A copy on your computer is safe even if the server has a problem.

Automatic Backups
Scheduled backups are a paid feature in Backuply. For more control, cPanel has its own backup tools. See our Bonus section.

2. Create Your Logo with AI
- ☐ Open an AI tool (ChatGPT, Gemini, Claude or Canva).
- ☐ Copy the request below, fill in the brackets and paste it in.
Copy This Request
Create a logo for my business, “[Your Business Name].” We are [what you do] for [who your customers are]. I want it to feel [friendly / professional / modern]. Use [your colors, or “colors that suit my business”]. Keep it simple and easy to read. Make it a wide horizontal logo, about 700 pixels wide by 140 pixels tall, on a transparent background, saved as a PNG. Also make a square version of just the icon, 512 × 512 pixels, transparent background, PNG. Give me 3 options.
- ☐ Pick your favorite and ask for changes if needed.
- ☐ Check the spelling of every word.
- ☐ Download both files: the logo and the square icon.

3. Add Your Logo
- ☐ Go to Appearance → Customize.
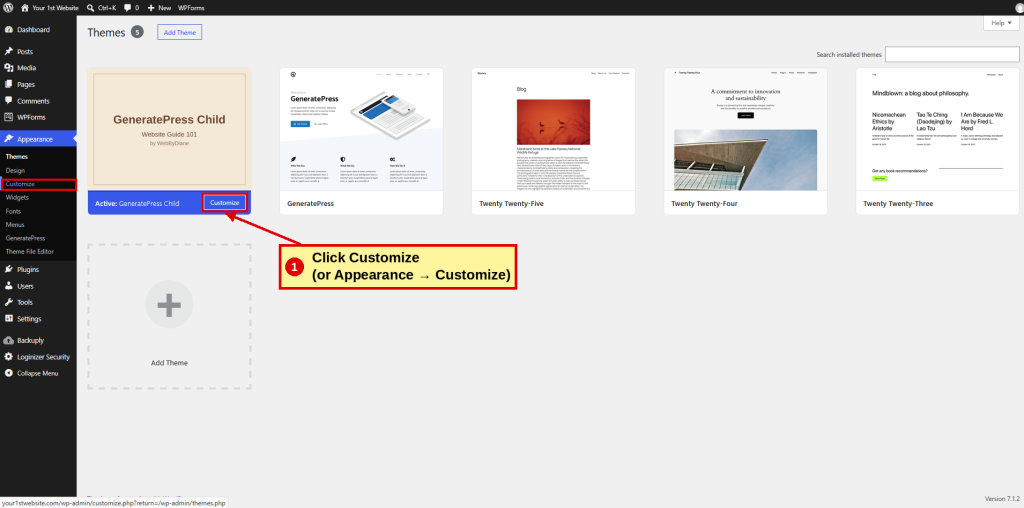
- ☐ Click Site Identity.
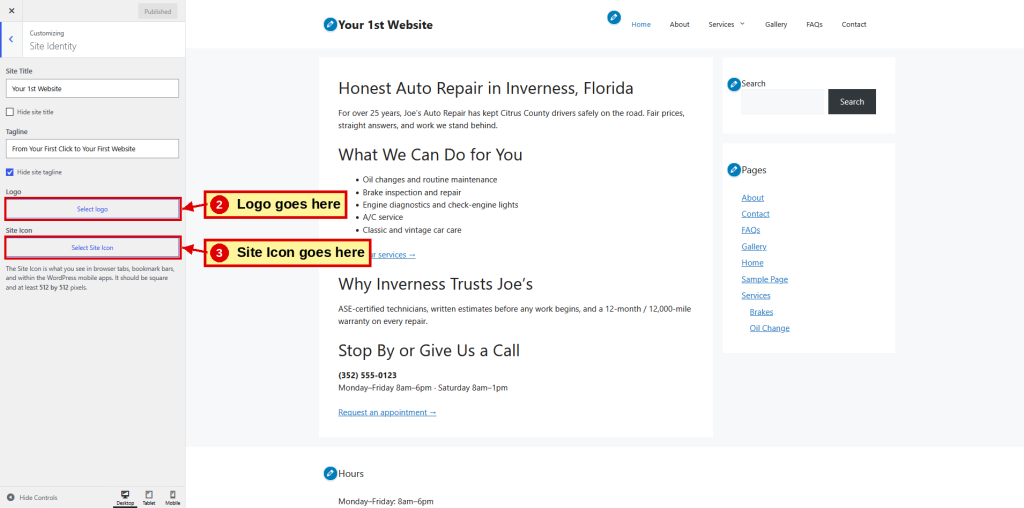
- ☐ Under Logo, click Select logo.
- ☐ Click Upload files, choose your logo, then click Select.

- ☐ Click Skip cropping.

- ☐ Check Hide site title and Hide site tagline.
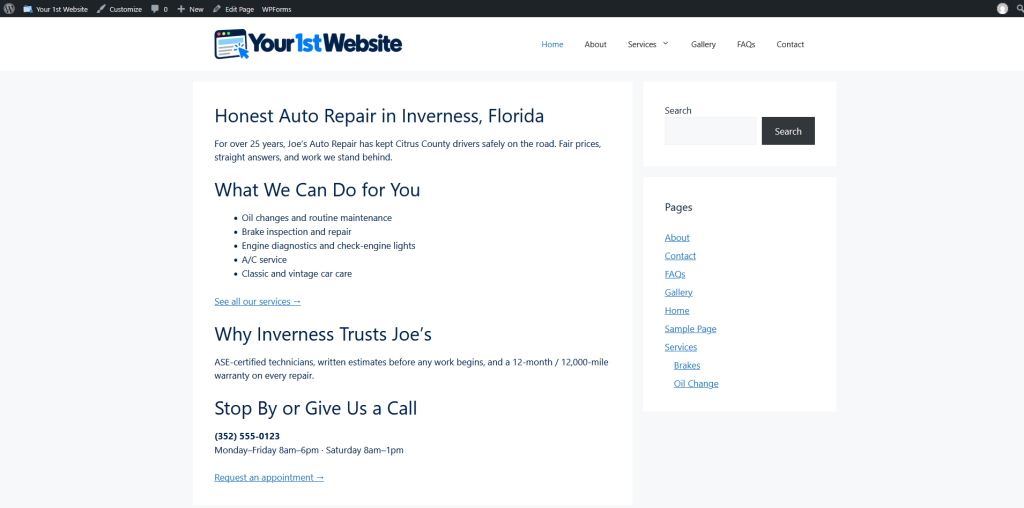
If your logo is too wide, your menu drops to a second line:

- ☐ In Logo Width, type 350.
- ☐ Click Publish.
4. Add Your Site Icon
Still in Site Identity:
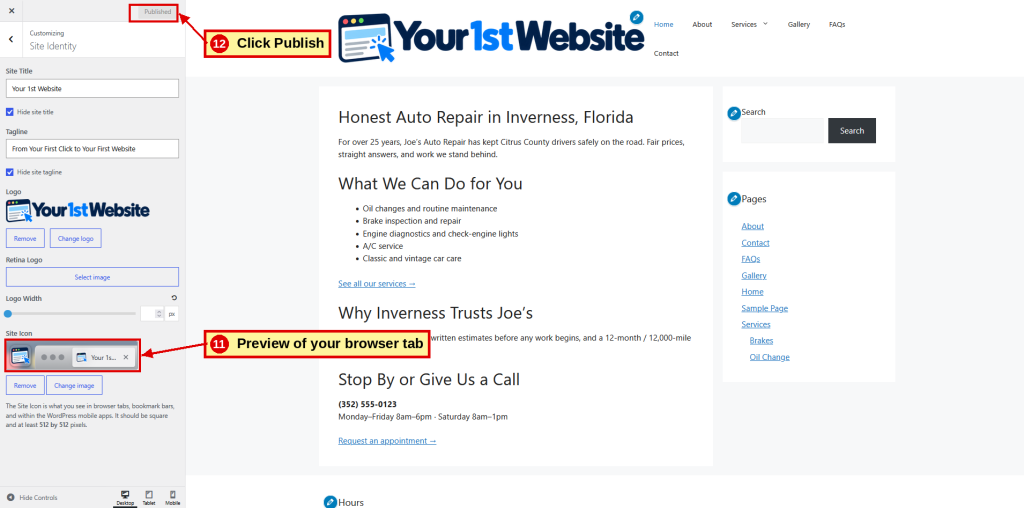
- ☐ Under Site Icon, click Select Site Icon.
- ☐ Upload your square icon and click Select.

- ☐ Check the preview of your browser tab.
- ☐ Click Publish.
5. Change Your Colors
- ☐ In the Customizer, click Colors.

Here’s the starting point, the theme’s default colors:

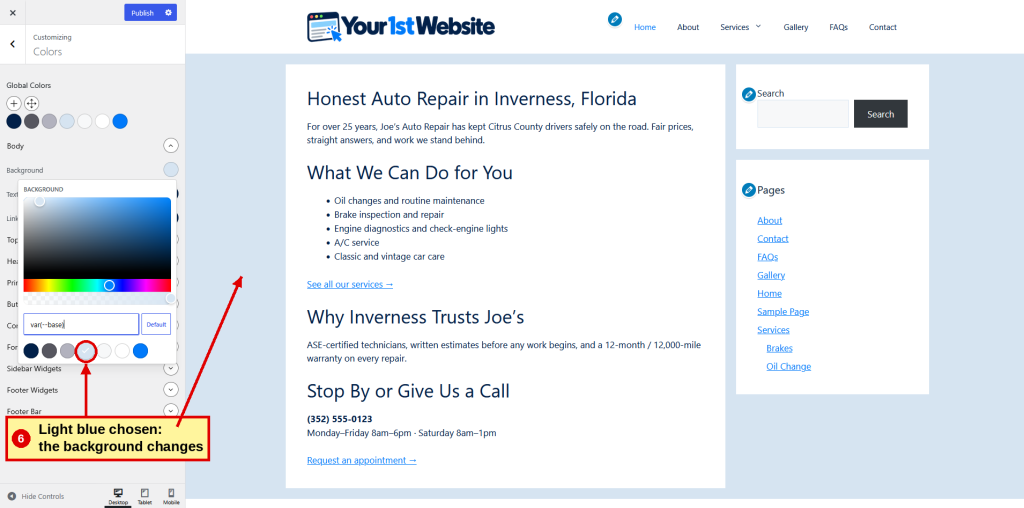
Page Background
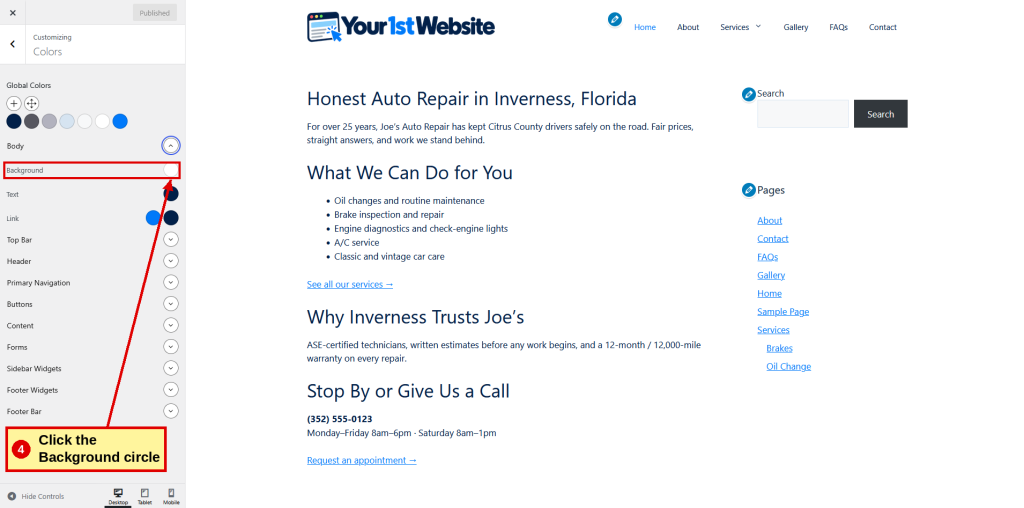
- ☐ Click Body, then the Background circle.
- ☐ Pick a color from your color scheme along the bottom.
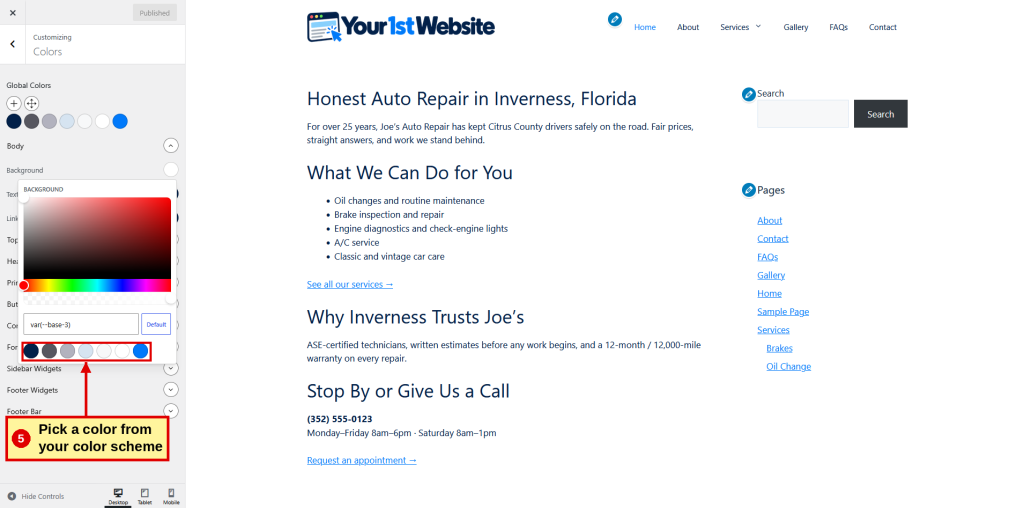
The background changes right away:
Footer
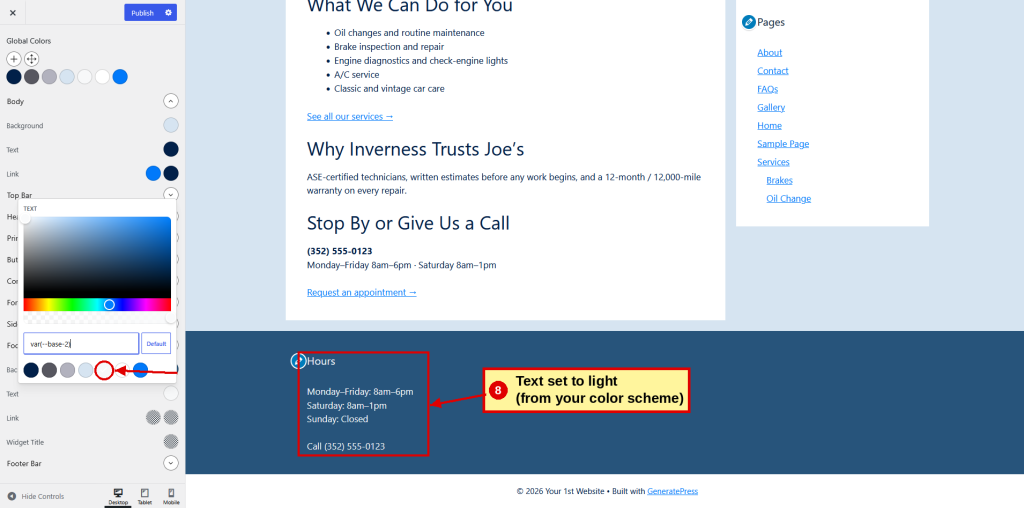
- ☐ Click Footer Widgets, then the Background circle.
- ☐ Pick a dark color.
Now the footer text is too dark to read:

- ☐ Click the footer Text circle.
- ☐ Pick a light color.
- ☐ Click Publish and view your site.
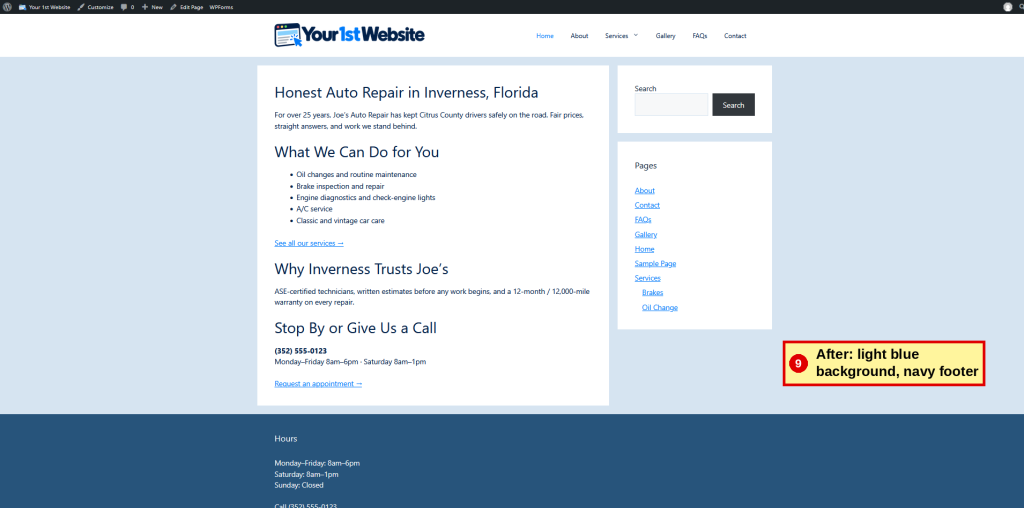
Dark on Light, Light on Dark
Dark backgrounds need light text, and light backgrounds need dark text. Changed your mind? Every color has a Default button.
6. Choose a Font
- ☐ In the Customizer, click Typography.
- ☐ Under Font Manager, click Add Font.
- ☐ In the search box, type a font name (we used Nunito) and click it.
- ☐ Under Typography Manager, click Add Typography.
- ☐ For the target, choose All Headings.
- ☐ For the font, choose the one you just added.
- ☐ Click Publish.

Keep It Simple
One font for headings is plenty. Two fonts at most.
7. Change the Copyright Line
Hide the Old Line
- ☐ In the Customizer, click Additional CSS.
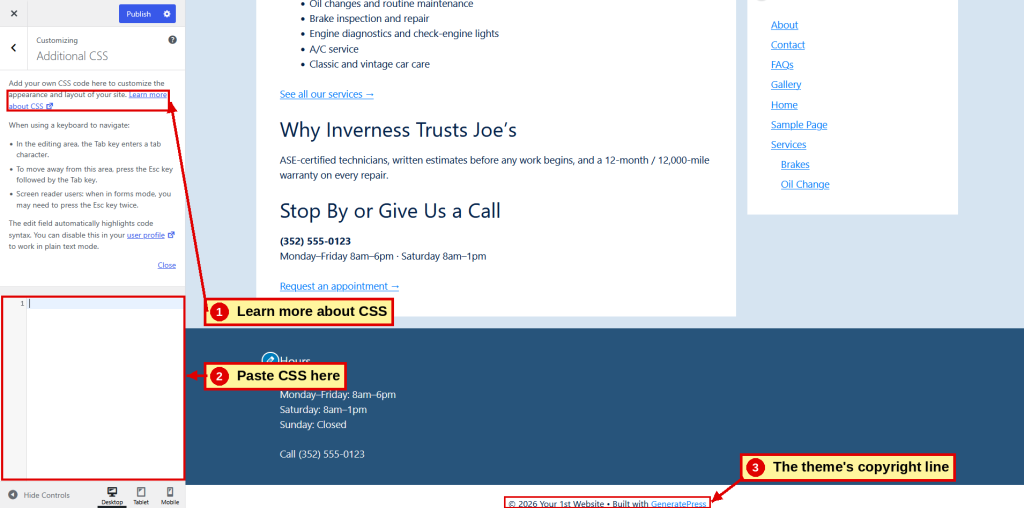
- ☐ Copy and paste this exactly:
.copyright-bar { display: none; }
- ☐ Click Publish.

Add Your Own
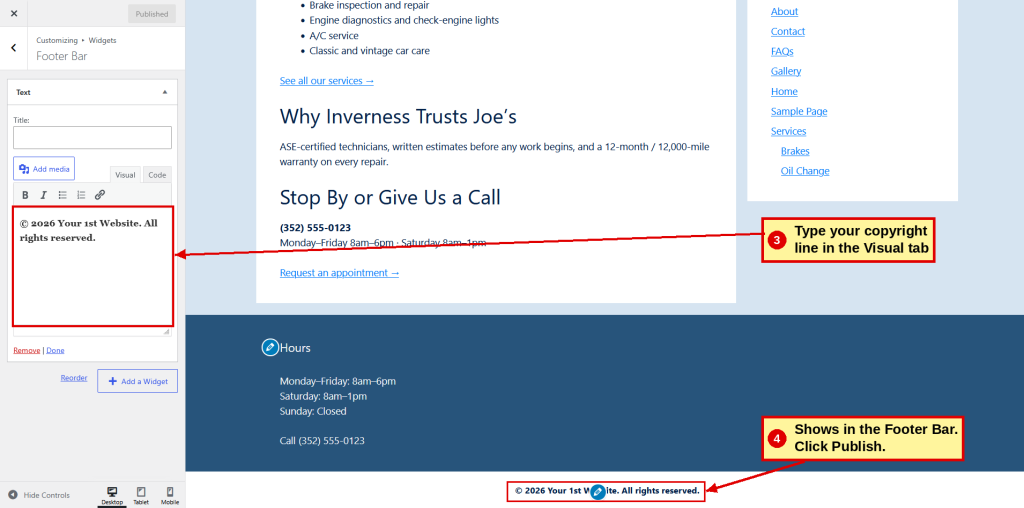
- ☐ In the Customizer, click Widgets, then Footer Bar.
- ☐ Click Add a Widget, search for Text, and click it.

- ☐ Leave the title blank.
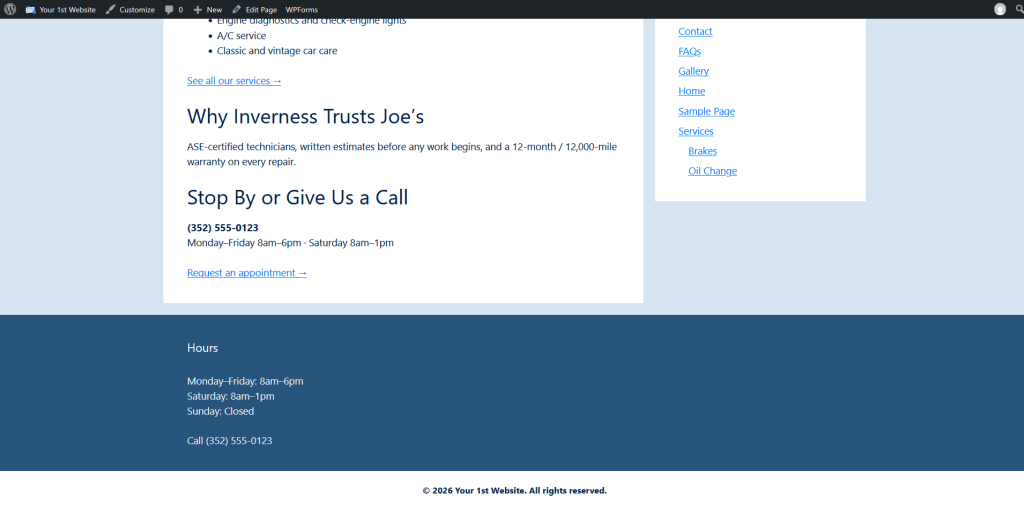
- ☐ In the Visual tab, type: © 2026 Your Business Name. All rights reserved.
- ☐ Click Publish.
Typing ©
Windows: hold Alt and type 0169 on the number pad. Mac: Option + G. Or just type (c).
Every January
Change the year at the start of each new year. Want it to update itself? See our Bonus section.
8. Final Checks
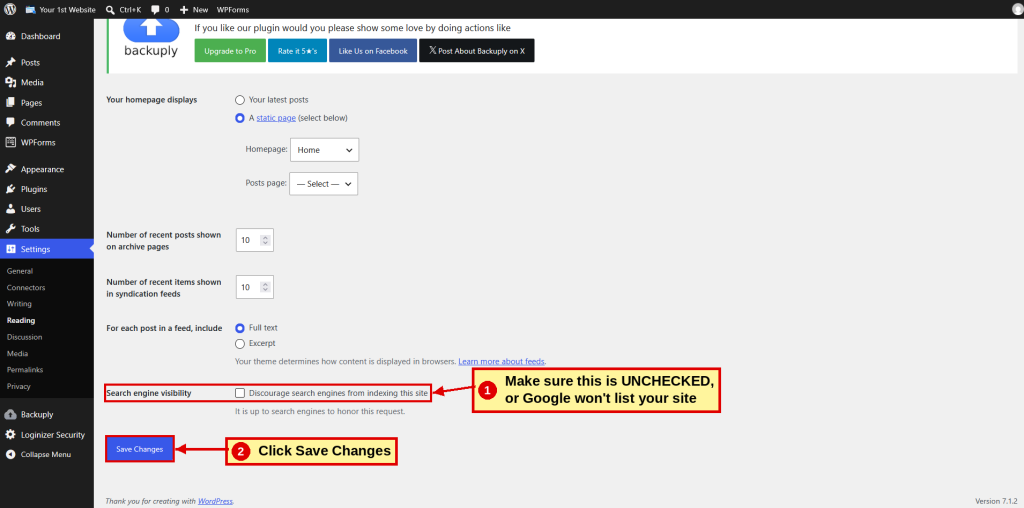
Let Search Engines In
- ☐ Go to Settings → Reading.
- ☐ Make sure Discourage search engines from indexing this site is unchecked.
- ☐ Click Save Changes.
Remove the Samples
- ☐ Go to Posts, hover over Hello world!, and click Trash.

- ☐ Go to Pages, hover over Sample Page, and click Trash.
Click Every Link
- ☐ Visit your website and click every menu item and link.
Check Your Site on a Phone and Tablet
- ☐ In the Customizer, click Mobile at the bottom left. Your menu becomes a ☰ button.

- ☐ Click Tablet.
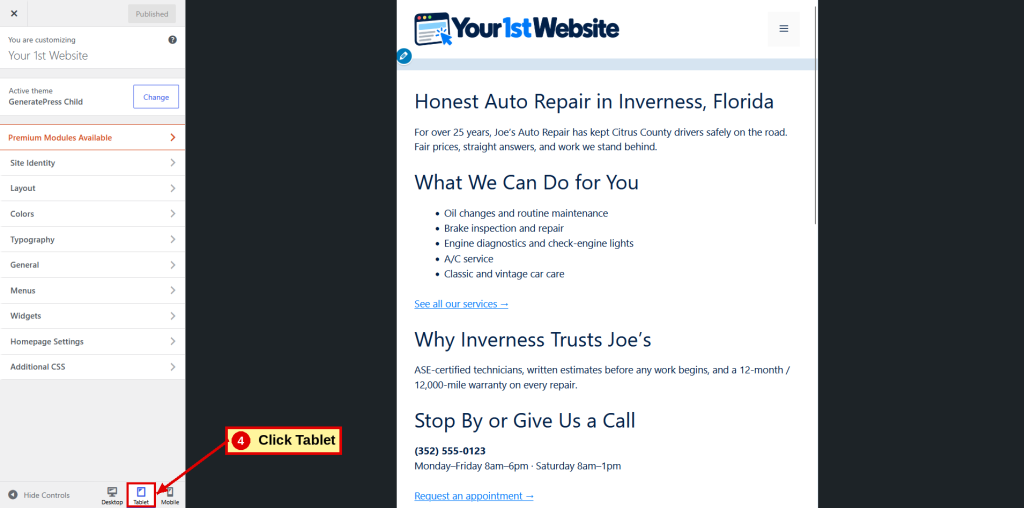
- ☐ Scroll through each view. Make sure nothing looks squeezed or cut off.
- ☐ Click Desktop to go back.
Back Up Again
- ☐ Make one more backup in Backuply and download it.
You Built a Website!
That’s it. Your website is finished, backed up and open for business.
Want to Do More?
Our Bonus section adds handy extras, like a copyright year that updates itself and full cPanel backups, without having to learn a lot of code.
Want to know more? Read Chapter 14: Final Touches.
| ← Step 16 |
Down & Dirty | Bonus Extras → |
