

Your hosting includes professional email. We’re going to create an address like joe@your1stwebsite.com, open it in Webmail and set your display name.
Why Bother?
An email address at your own domain looks more trustworthy to customers than a free Gmail or Yahoo address, and it’s already included with your hosting.
On This Page
| Log Into cPanel | Create Your Email Address |
| Open Webmail | Your Inbox |
| Set Your Display Name | Other Settings (Optional) |
| Getting Back to Your Email | |
1. Log Into cPanel
- ☐ Go to veerotech.net and log in.

- ☐ In the Client Area, click Log in to cPanel.

- ☐ In the Email section, click Email Accounts.

2. Create Your Email Address
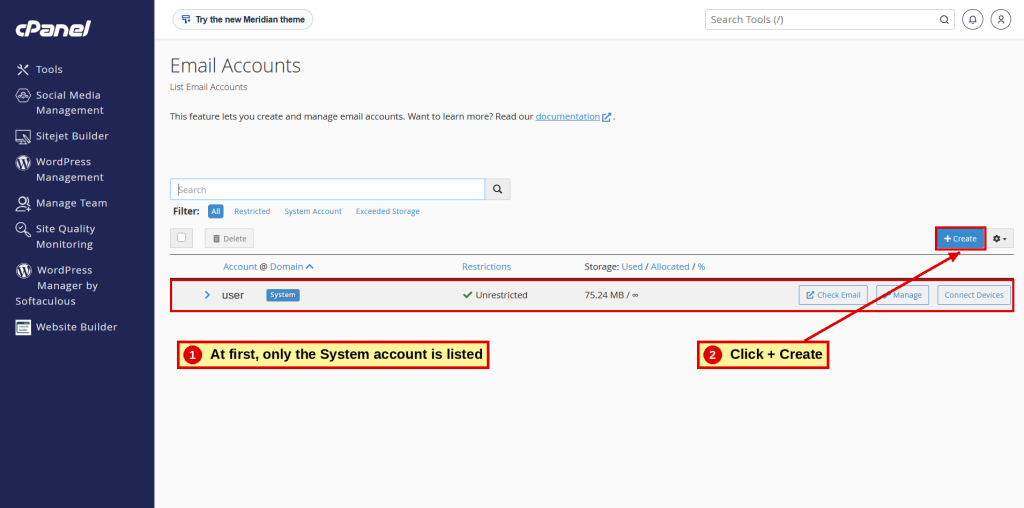
At first, only the System account is listed. Leave it alone.
- ☐ Click + Create.
- ☐ Domain: choose your website’s domain.
- ☐ Username: type the part before the @ (for example, joe).
- ☐ Password: type a strong password, or click Generate.
- ☐ Write your password down somewhere safe.
- ☐ Click Create.

Username Ideas
Your first name (joe@), info@ or office@. Short and easy to say over the phone.
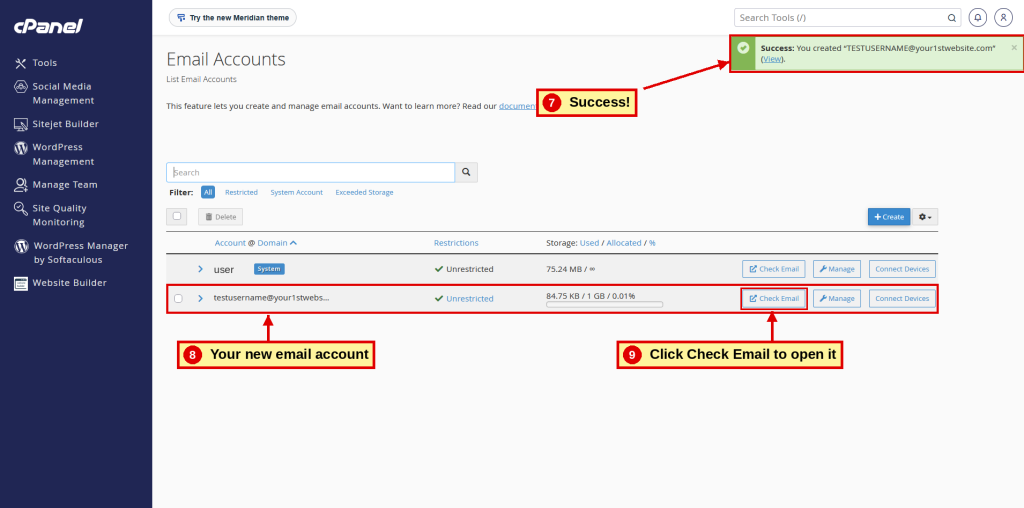
You’ll see a green Success message and your new address in the list.
- ☐ Click Check Email beside your new address.
3. Open Webmail
The first time, you may see a Consent and Privacy box.
- ☐ Check the box or leave it blank. It’s your choice.
- ☐ Click Save and Continue.

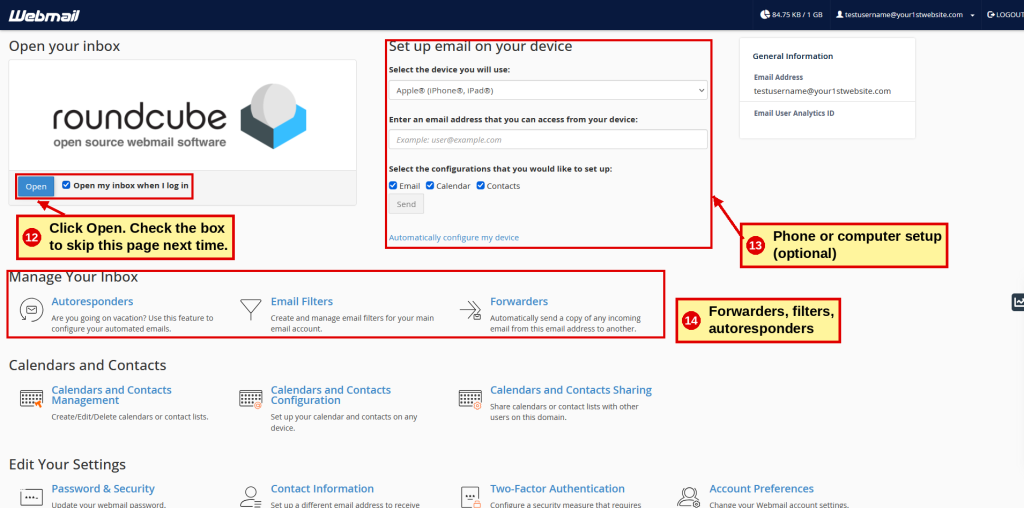
- ☐ Check Open my inbox when I log in to skip this page next time.
- ☐ Click Open.
Also on This Page
Set up email on your device sends setup instructions for your phone or computer. Forwarders, Email Filters and Autoresponders (vacation replies) are here too. All optional.
4. Your Inbox
You’ll already have one message from cPanel with setup information.
- ☐ Inbox and your other folders are on the left.
- ☐ Compose starts a new email.
- ☐ Settings is in the left-hand bar.

5. Set Your Display Name
- ☐ Click Settings.
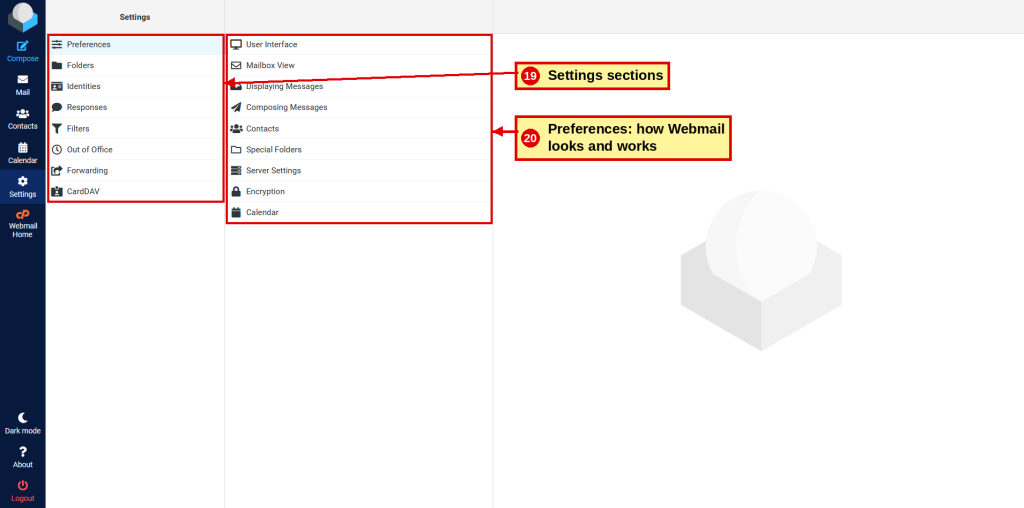
- ☐ Click Identities, then click your email address.
- ☐ Display Name: type your business name (for example, Joe’s Auto Repair).
- ☐ Signature (optional): add your phone number and website.
- ☐ Click Save.

6. Other Settings (Optional)
The defaults work fine. Here’s what’s there if you want to look around.
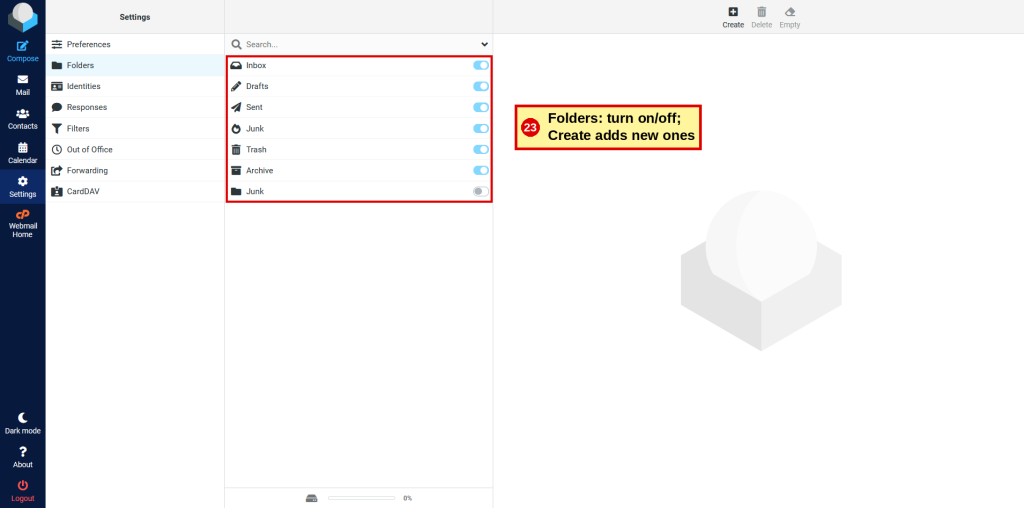
- Folders: turn folders on or off, or create new ones.
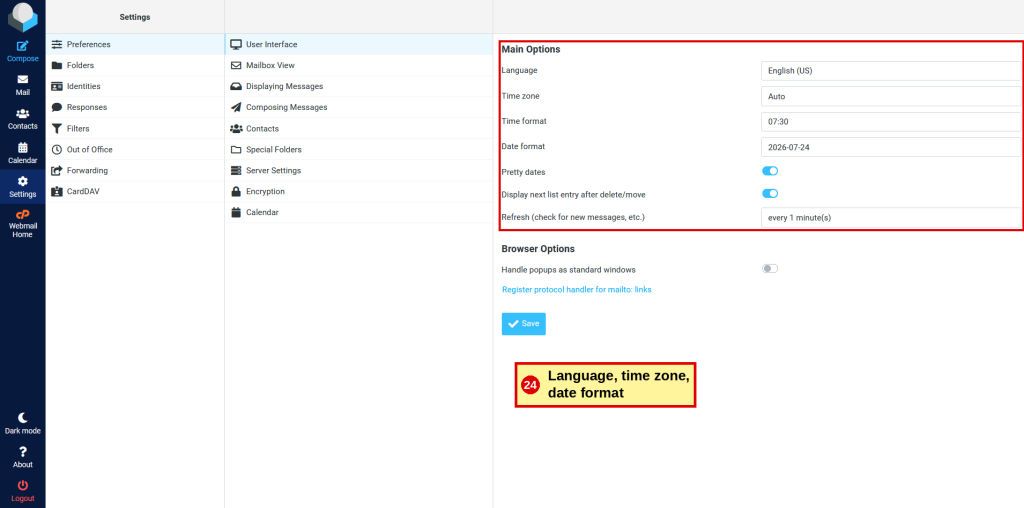
- Preferences → User Interface: language, time zone and date format.
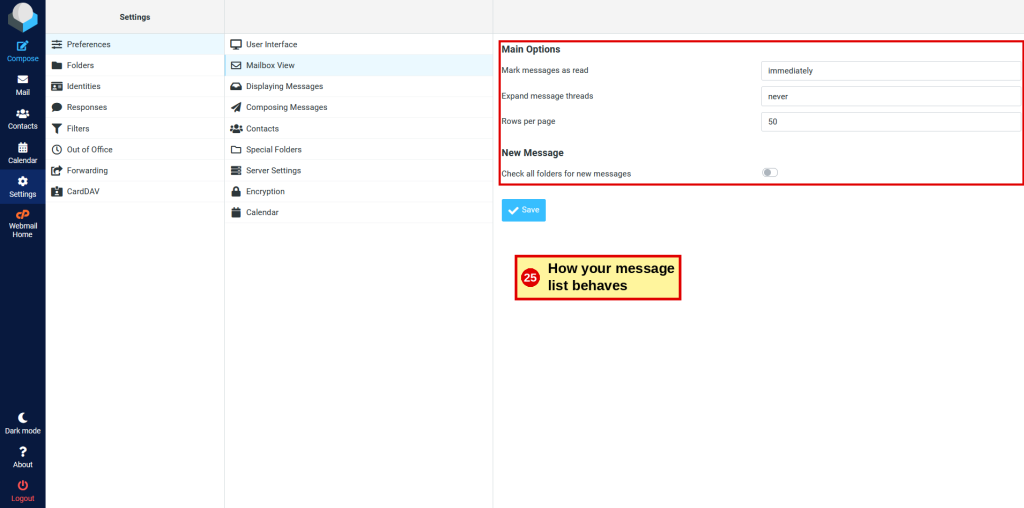
- Preferences → Mailbox View: how your message list behaves.
- Preferences → Displaying Messages: how emails are shown when you open them.

- Preferences → Composing Messages: writing options, including when your signature is added.

7. Getting Back to Your Email
- ☐ Go to your1stwebsite.com/webmail (using your own domain).
- ☐ Log in with your full email address and password.
Contact Form Messages
Your contact form sends messages to the Administration Email Address in WordPress under Settings → General. Change it to your new address if you want those messages in this mailbox.
Want to know more? Read Chapter 13: Email.
| ← Step 15 Widgets |
Down & Dirty | Step 17 Final Touches → |
