

Pictures show visitors your business before they read a word. We’re going to add a single image to a page, then build a photo gallery. No plugin needed. WordPress does both.
Get Your Photos Ready First
- ☐ Shrink them. A photo straight from your camera can be 6000 pixels wide and 4 MB. Your website needs about 1600 pixels and 300 KB or less.
- ☐ Name them. white-vw-beetle-repair.jpg tells Google what’s in the picture. IMG_4472.jpg doesn’t.
- ☐ Use your own photos when you can. Showing your real work beats a stock photo.
On This Page
| Add a Single Image | Create a Gallery |
| Upload Your Photos | Change the Gallery |
| Update and View Your Page | |
1. Add a Single Image
Use this for a photo on your About, Services or any other page.
- ☐ Click in the writing area where you want the picture.
- ☐ Click Add Media.
- ☐ Click Select Files and choose your photo.
- ☐ Type a short description in Alt Text.
- ☐ Under Attachment Display Settings, choose Alignment and Size.
- ☐ Click Insert into page.


What’s Alt Text?
A short description of the photo, like Mechanic working under a white VW Beetle. It helps people who can’t see the image, and it helps Google understand your page.
2. Create a Gallery
Go to: Pages → All Pages and open your Gallery page.
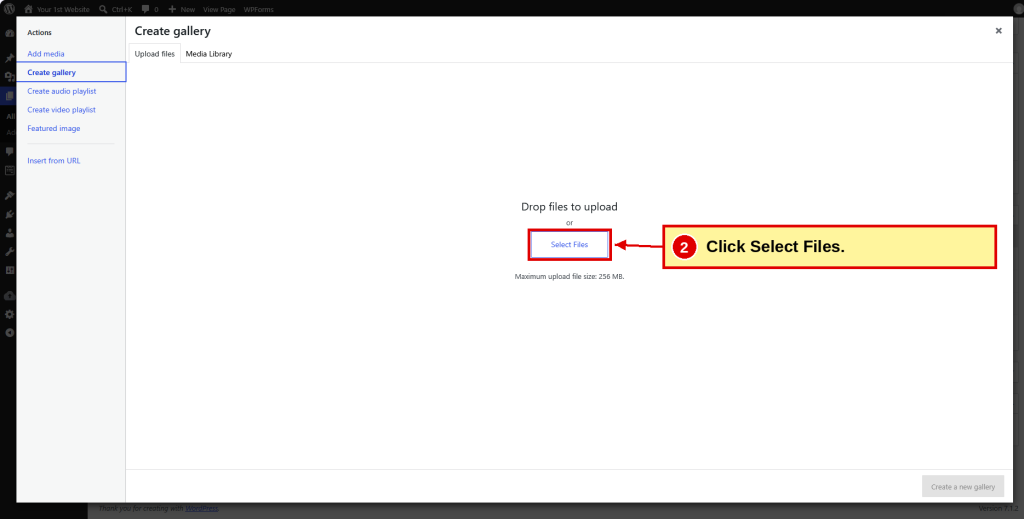
Click Add Media, then click Create gallery.

3. Upload Your Photos
Click Select Files.
- ☐ Open the folder with your photos.
- ☐ Click one photo, then press Ctrl+A to select them all.
- ☐ Click Open.

When the upload finishes, all your photos are checked.
- ☐ Click each photo and add Alt Text.
- ☐ Click Create a new gallery.

4. Change the Gallery
Your gallery is now on the page. To change it, click the gallery, then click the pencil.

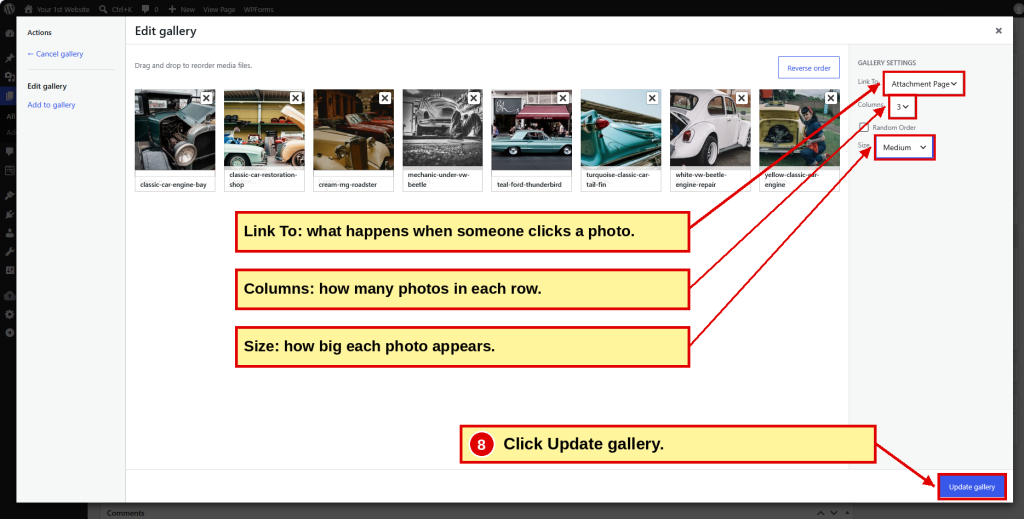
On the right, under Gallery Settings:
- Link To: what happens when someone clicks a photo. Leave it alone for now.
- Columns: how many photos in each row.
- Size: how big each photo appears.
Drag the photos to change their order. Click Update gallery when you’re done.
Here’s the gallery with 3 columns and Medium size:

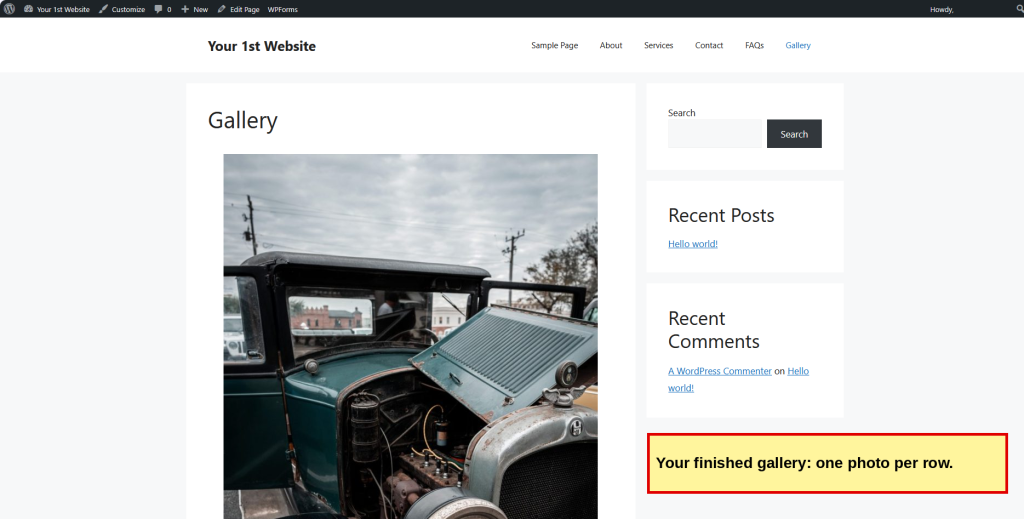
Want one big photo per row instead?
- ☐ Set Columns to 1.
- ☐ Set Size to Large.
- ☐ Click Update gallery.

5. Update and View Your Page
-
- ☐ Click Update to save the page.
- ☐ Click View Page at the top of the screen.

There it is, on your website.
A Few Good Photos Beat a Lot of Poor Ones
Start with a handful of your best pictures. You can add more anytime: open the page, click the gallery, click the pencil, then Add to gallery.
Want to know more? Read Chapter 10: Build Your Other Pages → Gallery.
| ← Step 12 Build a Contact Form |
Down & Dirty | Step 14 Menus → |
