

Build the menu across the top of your site, then add a dropdown.
Before You Start
All your pages should be published. Plan your order first: Joe’s is Home, About, Services, Gallery, FAQs, Contact.
On This Page
| 1. Open Menus | 2. Clean Up the Default Menu |
| 3. Add Your Pages | 4. Order, Location & Save |
| 5. Create Child Pages | 6. Build the Dropdown |
| 7. Check Your Menu | |
1. Open Menus
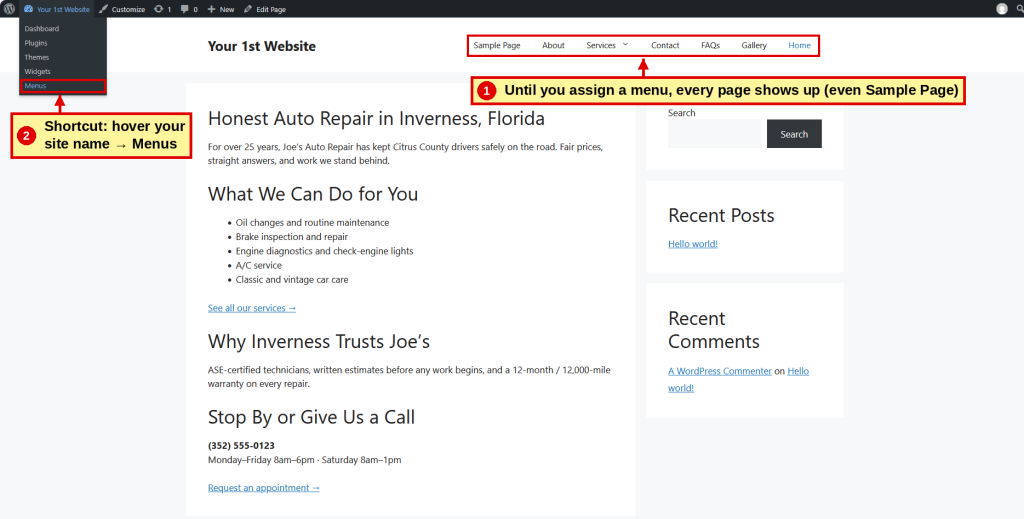
- ☐ Until you assign a menu, WordPress shows every page, including Sample Page
- ☐ Go to Appearance → Menus (or from your site, hover your site name → Menus)

2. Clean Up the Default Menu
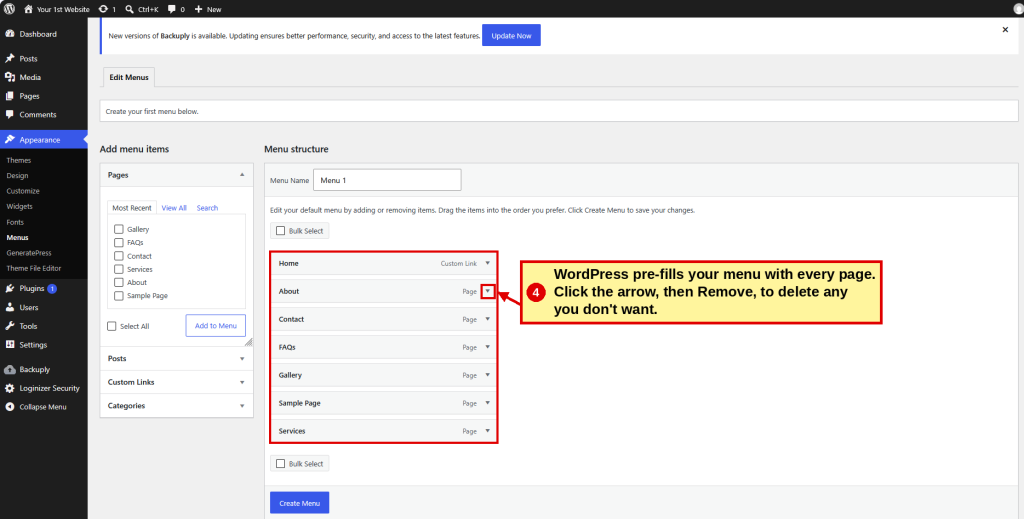
- ☐ WordPress pre-fills the menu with every page
- ☐ Click the arrow on each item → Remove
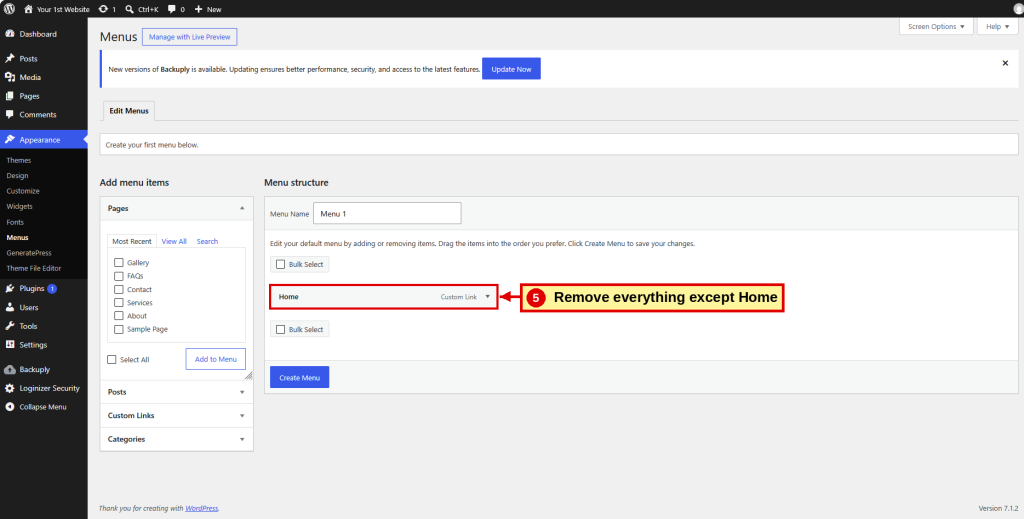
- ☐ Keep Home
3. Add Your Pages
- ☐ Name your menu (e.g., Main Menu)
- ☐ Check the pages to add (skip Sample Page)
- ☐ Click Add to Menu
- ☐ Click Create Menu

4. Order, Location & Save
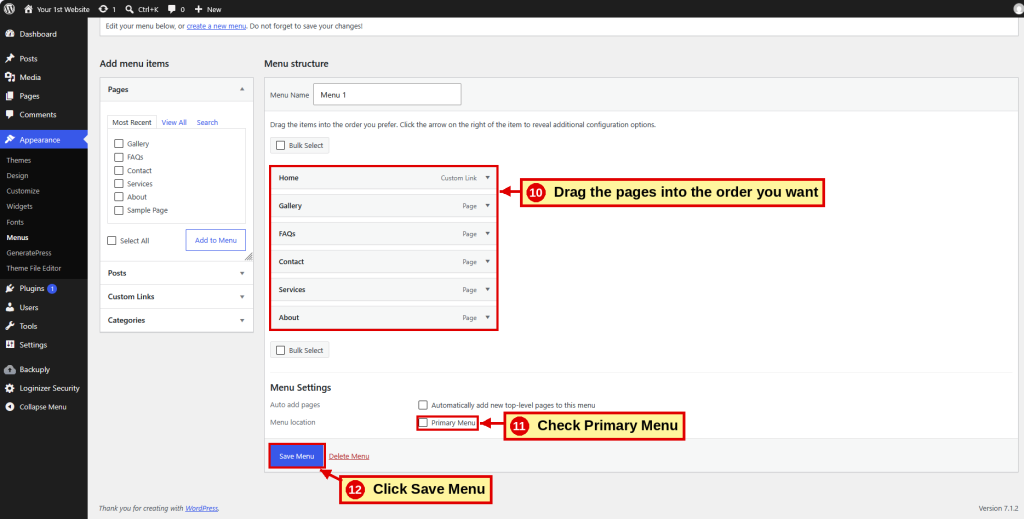
- ☐ Drag items into your order
- ☐ Check Primary Menu
- ☐ Leave “Automatically add new top-level pages” unchecked
- ☐ Click Save Menu
5. Create Child Pages
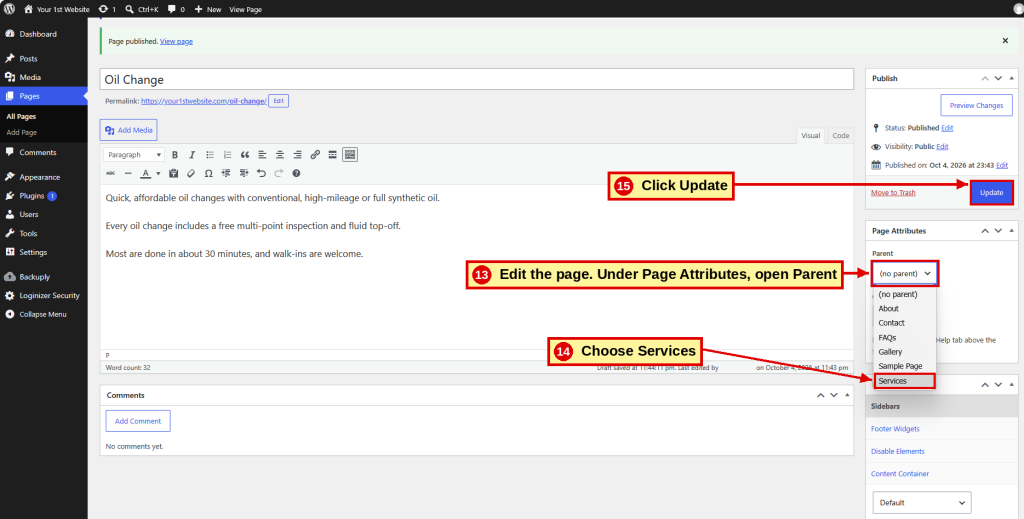
- ☐ Edit the page that belongs under another (e.g., Oil Change)
- ☐ Page Attributes → Parent → Services
- ☐ Click Update (or Publish for a new page)
- ☐ Repeat for each child page (e.g., Brakes)

6. Build the Dropdown
- ☐ Back in Appearance → Menus, check the child pages
- ☐ Click Add to Menu
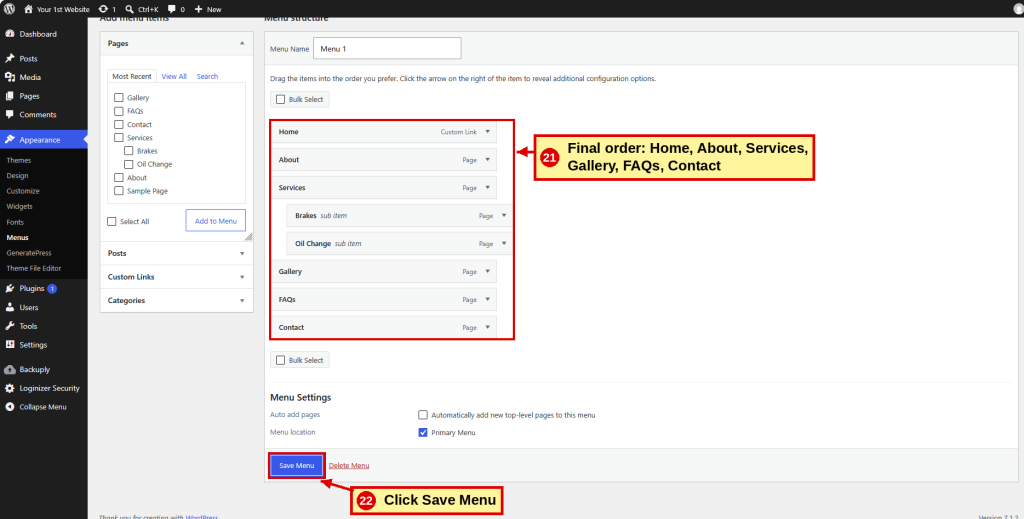
- ☐ Drag each one under Services and slightly right until it says sub item
- ☐ Check the final order
- ☐ Click Save Menu


7. Check Your Menu
- ☐ Visit your site
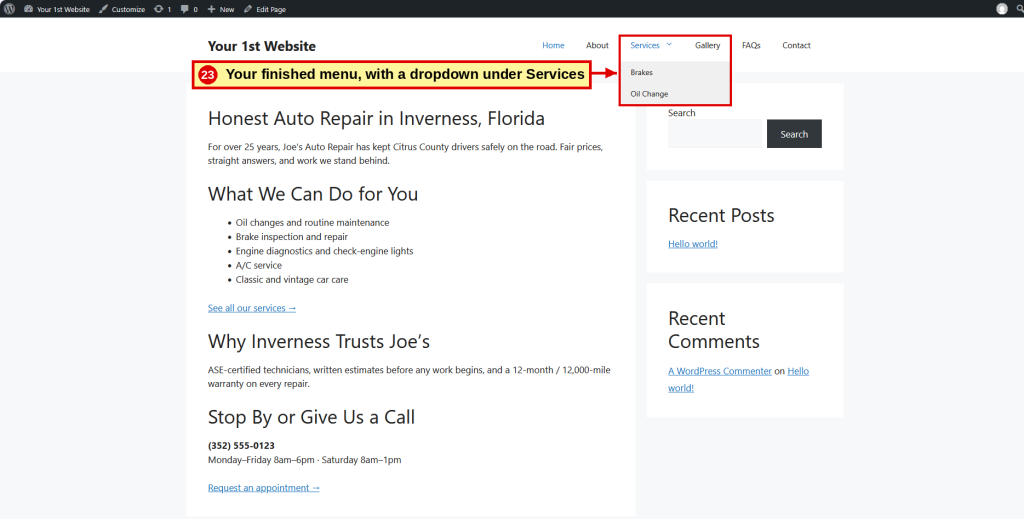
- ☐ Hover Services to see the dropdown
- ☐ Click every link to test it
Want to know more? Read Chapter 11: Menus.
| ← Step 13 Add Images |
Down & Dirty | Step 15 Widgets → |
