

You’ll Be Working In: Dynadot
In this step, you tell your domain where your website lives. It’s like filling out a change-of-address card at the post office. In Step 4, you’ll put your name on the mailbox at your new hosting.
You have your domain name and your web hosting. Now it’s time to connect them.
We’ll do that by telling Dynadot which nameservers your website will use.
1. Find Your VeeroTech Nameservers
Open the welcome email VeeroTech sent when you purchased your hosting.
Find the nameserver information and keep the email open. You’ll copy those names into Dynadot shortly.
2. Log In to Dynadot
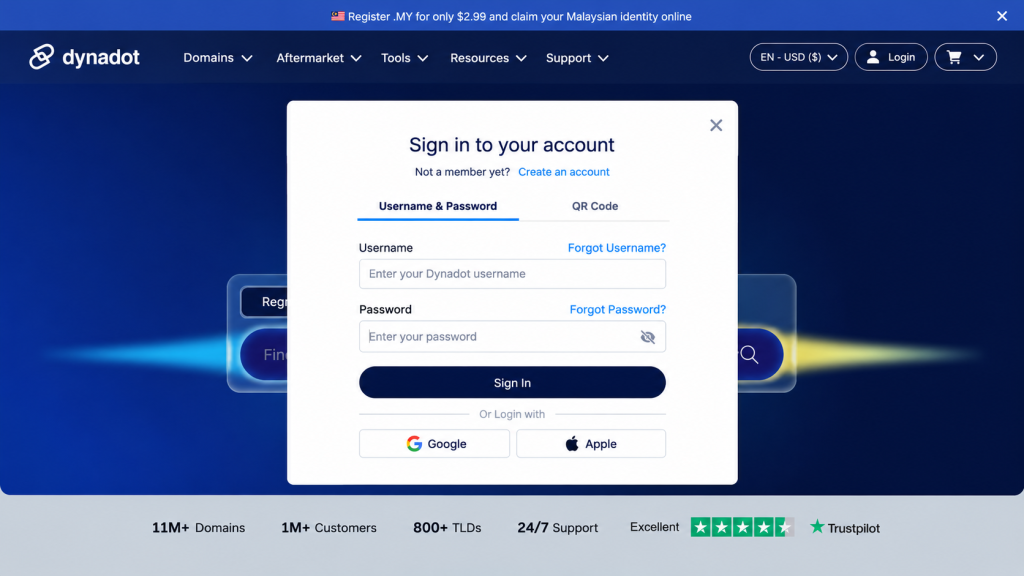
Visit Dynadot and click Login.
Enter your username and password, then sign in to your account.
3. Open Manage Domains
From your Dynadot account, open My Domains and select Manage Domains.
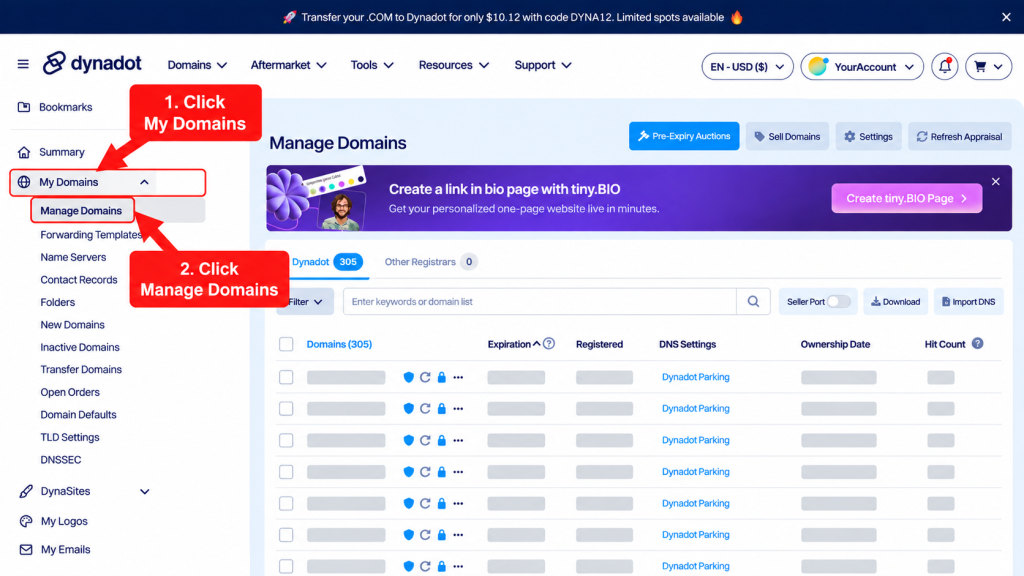
Find the domain name you purchased in Step 1. If you own several domains, use the search box to find the correct one.
4. Open DNS Settings
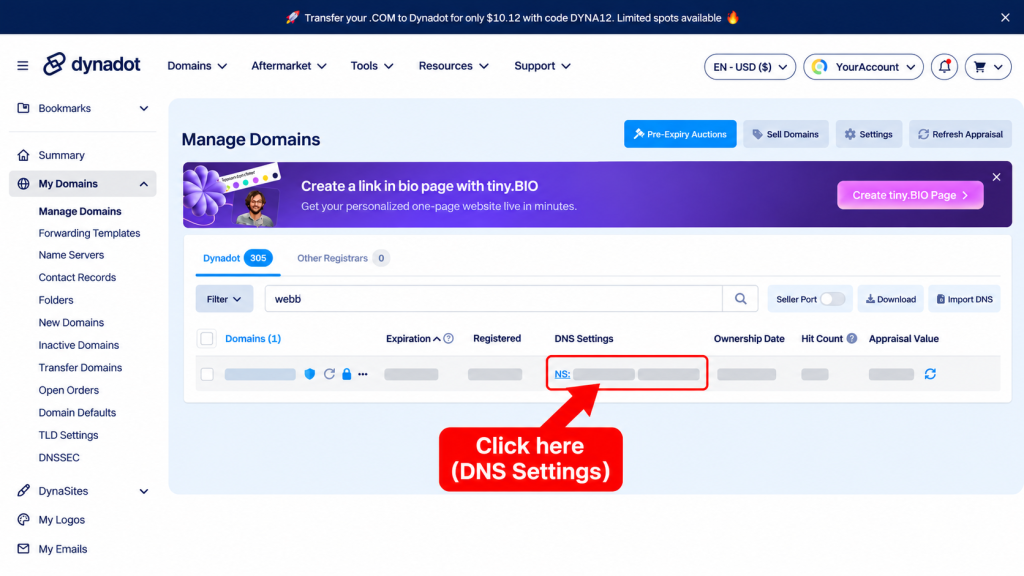
Find your domain in the list. Look across its row for the DNS Settings column.
Click the blue link in that column to open the DNS Settings window.
5. Select Name Servers
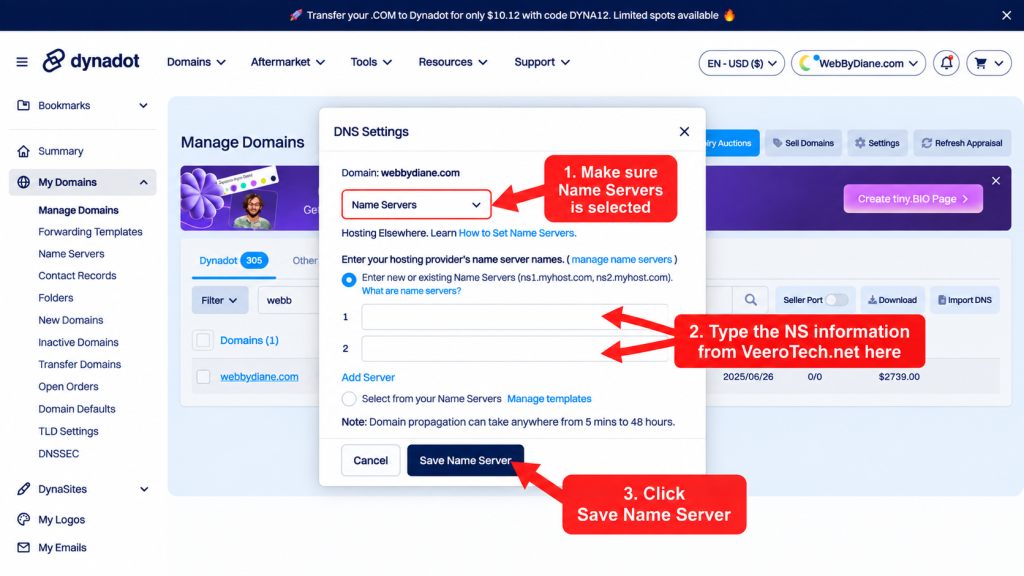
In the DNS Settings window, make sure the dropdown menu is set to Name Servers.
6. Enter Your VeeroTech Nameservers
Return to your VeeroTech welcome email and copy the first nameserver into box 1.
Copy the second nameserver into box 2.
Check your entries carefully. When everything matches your VeeroTech information, click Save Name Server.
7. Give Your Domain Time to Connect
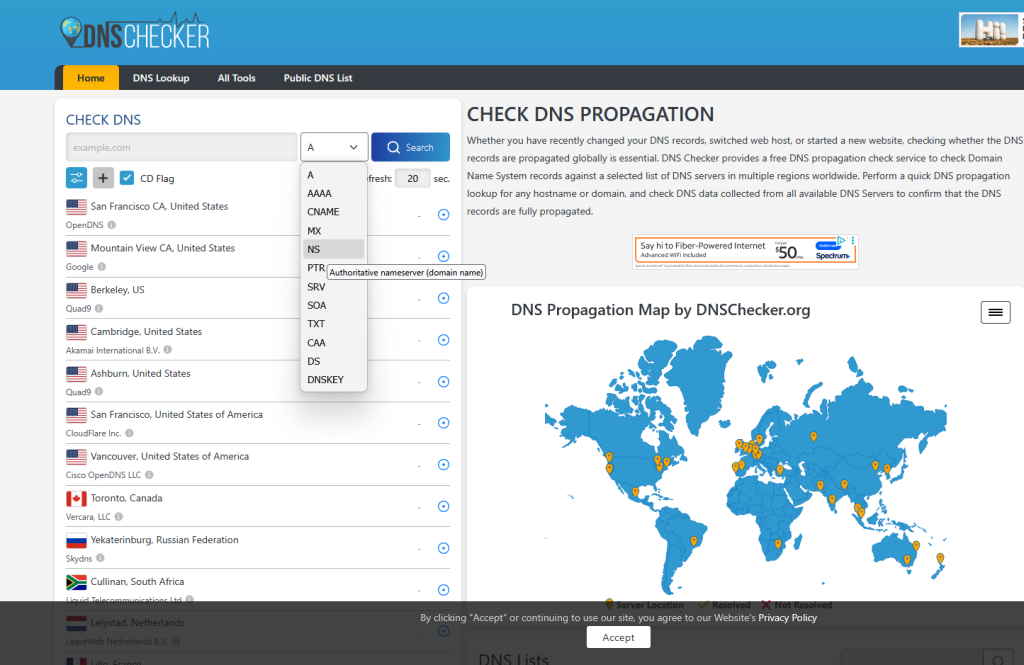
Your changes are saved, but they may not take effect everywhere immediately. This process is called DNS propagation.
Dynadot advises that propagation can take anywhere from a few minutes to 48 hours.
You can return to Manage Domains to check that your new nameservers are displayed.
Something Went Wrong?
I can’t find my domain.
Make sure you’re signed in to the correct Dynadot account. Check the search box and clear any filters.
I can’t find my VeeroTech nameservers.
Check your hosting welcome email or your VeeroTech client area. If you still can’t find them, contact VeeroTech support.
My domain isn’t connecting.
Check that the nameservers were entered correctly and saved. Allow time for DNS propagation.
Step 3 Checklist
☐ Found my VeeroTech nameservers
☐ Logged in to Dynadot
☐ Opened DNS Settings for the correct domain
☐ Selected Name Servers
☐ Entered my VeeroTech nameservers
☐ Saved my changes
Done! Your domain is now pointed toward your hosting. Allow time for the changes to take effect.
← Step 2 Buy Your Web Hosting |
Website Guide 101 Step 3: Point Your Domain to Your Hosting |
Step 4 Point Your Domain to Your Hosting→ |
Want to know more? Read the corresponding Full Guide chapter on web hosting.
